What is Modula?
Modula is a package for Unity Engine that helps splitting your code into smaller independent parts. Get Started

When needed, inherit from ModularBehaviour instead of Unity’s default MonoBehaviour class.
This lets you split all the logic inside of your component and move it
into independent modules,
which could later be connected to/removed from each instance of that component,
using the inspector GUI:

That way by distributing the code into small self-containing modules you could make the codebase cleaner and easier to understand.
Brief Overview
The final gameobject designed using Modula should consist of these components:
- Main behaviour script
// Main Behaviour
    public class Car : ModularBehaviour
    {
         // Your code as you do it usually
         ...
}- Some connected modules
// Example Module
    public class Engine : Module
     {
         void Start() { ... }

         ...
}- Other unity Components you need for this system
Installation
There are multiple ways to install Modula.
We recommend using it as Unity Package Manager (UPM) Git dependency:
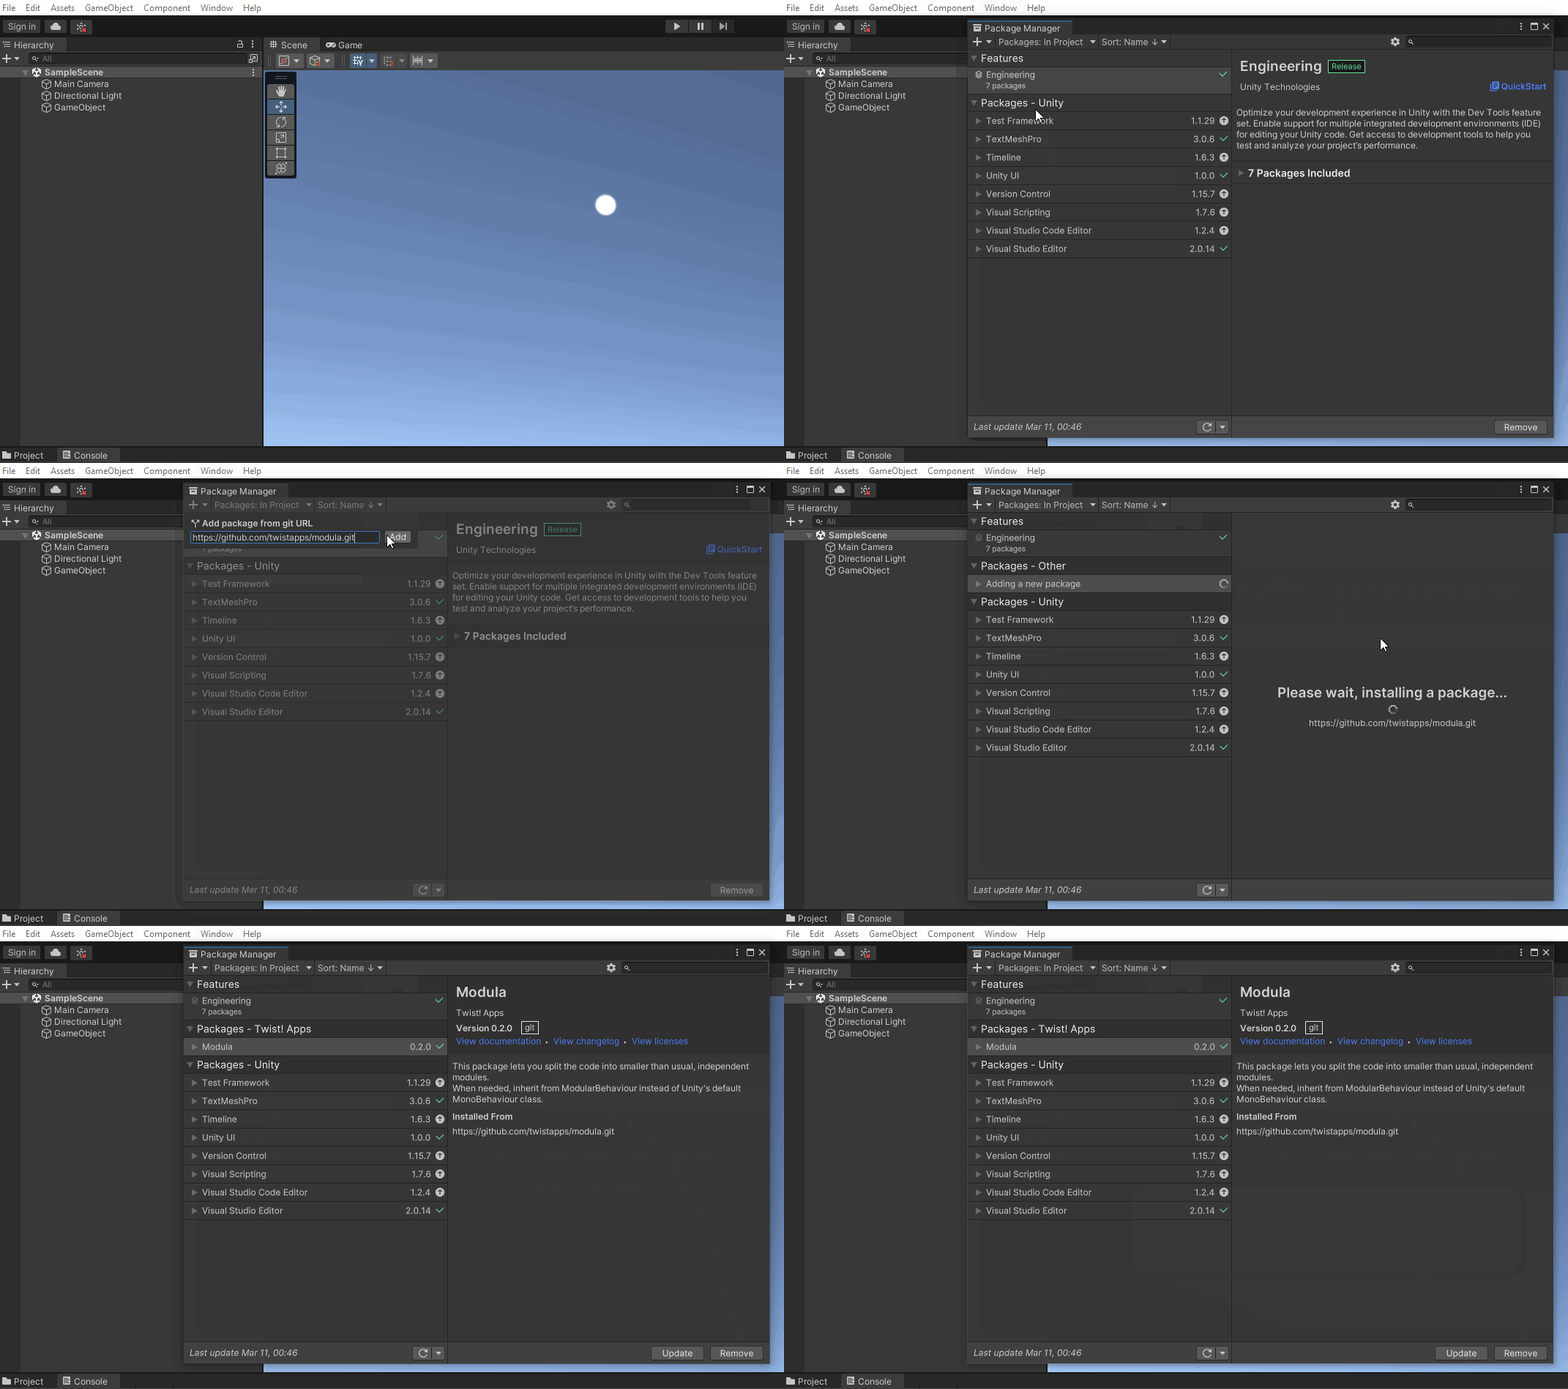
1. Recommended Method (UPM Git Dependency)
- In Unity, go to Window ▶ Package Manager
- Click ”+” ▶ Add Package from Git URL…
- Paste this link:
https://github.com/twistapps/modula.git - Wait for unity to download the package for you!
 Click on the image to see in full screen
Pros & Cons
- Faster updates: don’t need to wait for Unity team to approve the package. Download updates right when they’re ready and published
- “Under the Hood” usage: no code in your
Assets/folder at all.
con: it’s not so straightforward to dig into the source code because it’s hidden in
Packages/ folder.
Choose this method if you want Modula to work under the hood without littering your Assets/ folder.
There are other installation methods listed at “Installation” page.
Updating
Check out the full page to read the update instructions.
Next Steps
Code your first module by following Quick Start instructions.
